Thursday, 3 March 2011

aircraft build - Cockpit + windows


Front of fuselage - select - quick slice horizontally for top of cockpit - cut bottom outline angles across geometry


Highlight polygons to become cockpit - detach


Change material - use raytrace to create darken glass (material - maps - reflection / refraction - add raytrace bitmaps - 80%


select - fuselage - edge - quickslice - horizontal lines for top + bottom of windows - select 4x groups of polygons with 4x group polygon gaps. To select both side at once - turn off ignore back facing - hold alt to allow drag select + hold ctrl to add selections (or just use alt to cancel selection) release alt on selection whilst dragging just holding ctrl.    EG alt+ctrl - drag over polygons (in orthographic side view to select polygons on opposite side accurately) - release only alt when finished dragging - release mouse click


Inset (by group selection) - inset again - move polygons into fuselage (indent)
Turbosmooth 2 incriments


Aircraft build - Adding materials

Using symmetry / mirror replicate completed wing + rudder to complete plane.


Create materials to relate to elements functions (eg tyres / rubber) rubber  = blinn material no shine + black. Metal = grey - anthroscopic - high specular + anthroscope with rotation 


Cover entire plane with basic materials


Create second + third etc metals to create different appearances since not all components are of uniform material or colour


Select fuselage - quick slice - two slices (horizontal) positioned for skyfleet colours (see reference pictures of plane for positioning)


Select polygons on tail - Detatch


Highlight polygons inside two ''quick sliced'' lines (this can be difficult to achieve directly - over highlight polygons and remove as necessary) 


Detached tail polygons will not be blended with strip


materials - diffuse layer - bitmap - created skyfleet colours


Detach centre section so bitmap is not as distorted (stretched)


Apply material - adjust shape / size / position until desired result is reached


Apply reversed bitmap to opposite side of fuselage


Apply separate materials to either end of strip (blue material to front - yellow to rear)


Add reflect / refract as desired for enhanced finish - use raytrace as bitmap


twist antroscopes to angles that allow more realistic reflections


aircraft build - wing tips

Select tail rudder (vertical) - clone - rescale - move to position on wing tip - manipulate shape / size to fit properly - attach to wing to prevent movement

Aircraft build - Attaching wing

First attempt - created flat ''joining'' surface to link wing. - failed


Second attempt - highlighted and removed polygons where wing would be placed. Manipulated hole to resemble wing outline. Bridge. Failed (bridge was twisted and untidy


Third attempt. Created moulding body - select cap polygon - bevel - repeat + manipulate bevel. Detached - adjusted position and scale 


Re-attached using bridge. Elements overlap (wing mould enters fuselage without connecting directly)


Fuselage edited (vertex positions manipulated) to create flat surface for undercarriage


Saturday, 12 February 2011

Aircraft build - Under carrage

Tyres
standard primatives - cone - size using reference planes


Editable poly - edge - loop select both sides - scale - drag inwards


Turbo smooth


Select edge - loop - select second loop - scale in


Wheels

Cylinder - line up geometry with tyre - hide tyre - [height segments 1] [cap segments 3]


Editable poly - select edge - loop - scale


Select poly - move geometry backwards - FIND OUT DOESNT WORK - REPEAT PROCESS USING CAP SEGMENTS 5


Repeat process - next slide showing intended result with materials + turbo smooth + attached to tyre


Tools - mirror - offset 1.0 - y axis - instance (so changes apply to both)


Cylinder to bridge gap - attach


Tools - mirror - add cylinder to bridge gap


Copy - instance


Extend undercarriage support arm up to fuselage. Select polygon that would intersect. 


Extrude - inset - move polygons back into fuselage leaving square tube.


 Remove front / rear sides of tube. Bridge gaps in remaining tube sections. Extend undercarriage arm up into fuselage


Reposition rear gears to mimic 747 positions. Begin enhancing appearance. Support leg change from single cylinder to larger diameter on top of smaller diameter cylinder (raise cylinder - select bottom polygon - inset - extrude) - create clones and rescale + position to create more realistic appearance


Select polygons where undercarriage doors would be - this will allow a reference point when flicking between vertex + polygons because selections are saved


Manipulate vertex to create more accurate door profile.


Detach - extrude for thickness


Rotate into position


Aircraft build - Tail fin

Take earlier made centre rudder - highlight - right click - clone
move clone into position


rescale - manipulate - vertex to create new shape


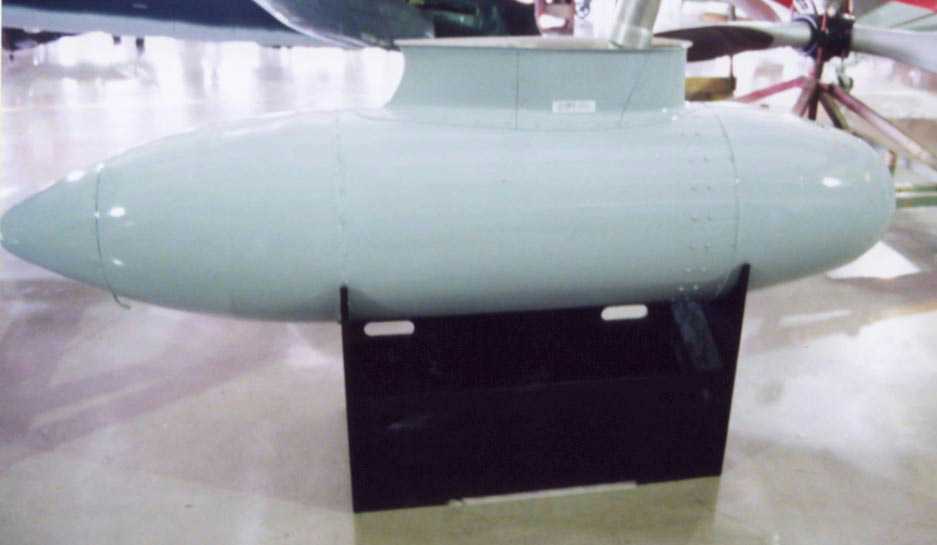
Aircraft build - Fuel Pod

Research pic


http://www.warbirdphotographs.com/Harada/H-Zero-DropTank-35.jpg


Create profile - lathe - cap ends - stretch - scale - turbo smooth -  position - attach