
STORY BOARD - use as guidelines
Once everything is in scene and starting positions - time to ANIMATE!!

First animation involves hangar doors opening. Turn on set key - set initial key - move timeline to end movement time frame - move hangar doors to finishing position - set key - check animation by dragging slider back and forth or press play.

Going into graph mode (found next to rending on top button bar) more accurate adjustments can be made to animation movement path. Using tools change paths to slow accelerate in and out

Airplane movement of start frame and finish frame are set initial like the doors. To produce the smooth curved transition out of the hangar and rotating all done afterwards in graphs. After lots of manipulation and aircraft path is set correctly tow truck was then introduced and individually setup to appear to be towing aircraft

Original design involved tow truck being directly linked to aircraft front under carriage to literally pull/tow aircraft out of hangar, however many problems occurred with correct parent child linkages (left engines behind, wings detached etc) due to time constraints decided to animate separately

This view shows animating tow truck to line up with front landing gear (plane hidden) through individual frames if necessary to achieve correct appearance

Cameras are then added to scene and animated to create view points for rendering final film

Used same techniques to animate texron truck. However this time camera was created first and truck manipulated to view to give desired appearance, found graph altering very accurate so continued to use this technique
JUMPING ONTO TRUCK SCENE

Loaded main scene
STRIPPED ALL UNNECESSARY GEOMETRY/MATERIALS/LIGHTS to allow for faster computer processing + future rendering. Used same scene however for scale, to make sure everything was done to same scale as other scenes

Merged man, steps, truck into scene , checked all to scale, hide mans skin to use less memory and allow computer to run smoothly (also can be easier to view how man is moving in animations)

Begin with creating steps (footsteps) using steps tool - selected running - create multiple steps - adjust settings to desired configuration - create many steps 30+, (a lot easier to remove footsteps then add to a smooth sequence)
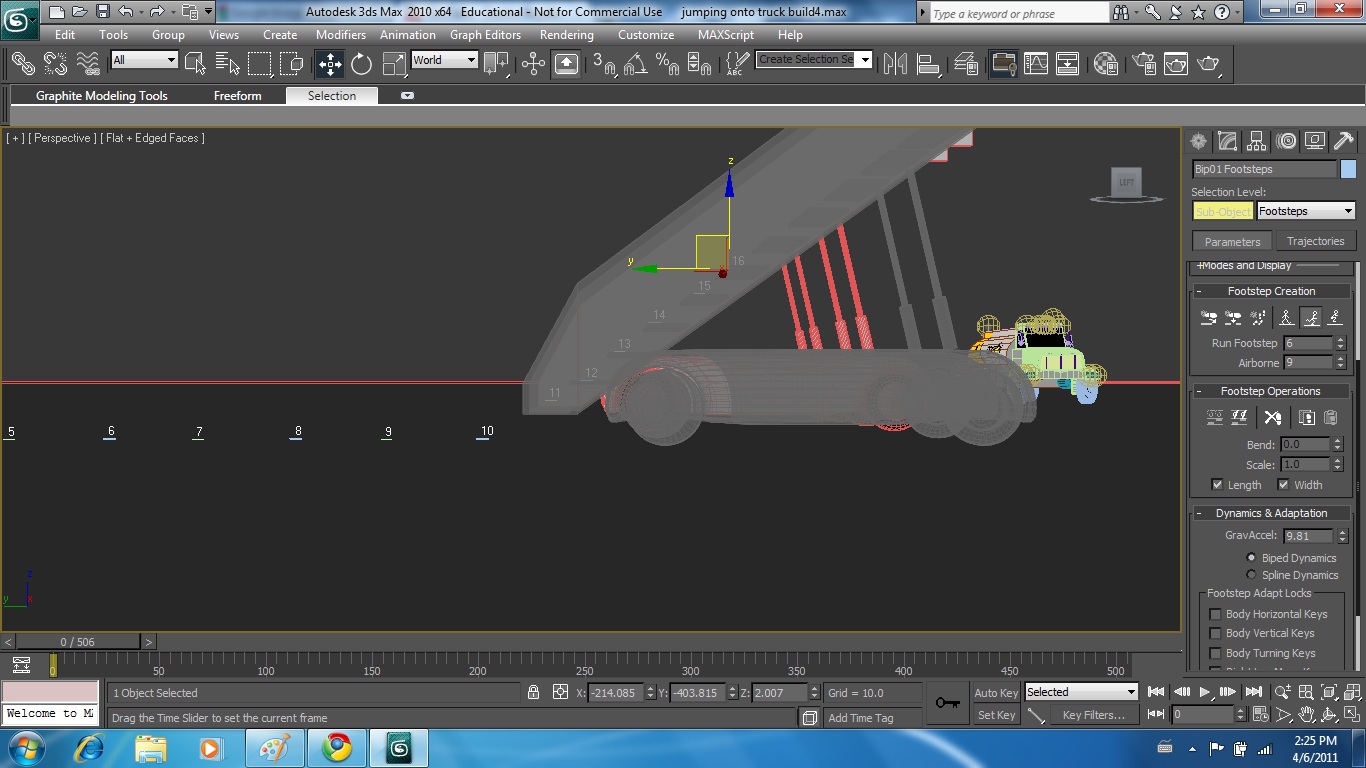
Move foot steps up onto STEPS component to make man run up the stairs. Use alternating steps (alternating feet) so man runs up stairs one footstep per step. Repeat process to top step. Delete any extra footsteps.

Change function to jump. create steps - place right and left foot landing steps (anywhere on ground) then move into landing position on truck. Test animation as shown above transition required modifications

Increased air time of jump to test. Solved initial problem of dropping through steps however created new problem of jumping 20ft in the air.

Time adjusted to achieve correct arc of flight.

Now basic overall movements are set animation studied to look for faults and irregularities. Changing to normal mode (out of biped mode) - auto key adjustments to movements and positions can be made without stopping original movements

Arm movement was then enhanced for each step to create more urgent running animation

Leg position were they altered step by step to flow with arm movement

Lift off point of jump was rebuilt frame by frame to create illusion of leaping instead of stepping off last step

Legs and arms cycled to create more realistic flailing jump.

Jump landing altered to show less clean landing (stumbled landing)

Truck then animated to cross at point of man landing - animation then created frame by frame to show man falling off truck and holding on to back. Start and end positions were defined then sequence analysed and altered to improve appearance

Camera then added and animated to complete sequence
ADDING MAN TO EARLIER SEQUENCES

Man then added to early sequence on to side of truck. Since truck + camera was already correctly animated man is added in stages. Since camera cannot see man in half of shot accurate placement is not required through entire motion only in visible frames.

When watched from other camera angles it can be seen that man is not properly placed. This would be unnecessary work to do.

Animation for camera 3 then constructed (man falls off truck). Using multiple cameras can make position manipulation easier

Graphs are then edited as before for fine tuning and smoother transitions
EXPLOSION

Animated plane falling into pieces. Needed to separate groups to do this, which resulted in previous animations being destroyed. This final sequence to the animation and explosion had to be saved into a separate file so both sets of animations can be accessed for rendering

Explosion creation unknown so tutorials were sought out online to help understand process

These techniques were then created in a separate "test" file to check working process and experiment quickly without having to load unused scene

Test renders were run to see visual results using different settings

helpers - particle systems

particle array (PArray) - drag out gizmo. Originally wanted to explode plane fuselage, however computer began to slow down drastically and with time constraints decided to explode sphere directly next to aircraft for similar effect. Due to camera angle difference what not be noticeable

Create sphere - reselect PArray gizmo and pick sphere as object

Select settings to create appropriate explosion particles (size, number, rotation etc)

Helpers - atmosphere effects - sphere gizmo - place over sphere (start of explosion size at start explosion frame) - drag timeline to end of explosion - increase scale of gizmo to end explosion size - add atmosphere effects - add fire effect - setup fire effect - alter settings - scroll to bottom setup explosion timeline

Test rendered explosion, found objects around were effected but actual atmosphere effects were not loaded. Looked for help online, was told this is a glitch with 3ds max 2010 64bit when the render is changed atmosphere effects fail to load. Went back to ''test'' file, changed the render, changed back and of course atmosphere effects disappear.

Several ideas to get around this problem were tried. Eventually, managed to get files to load.

Process involved saving the settings in test file where the render was originally working, opening my work file (to be animated/rendered) loading the working renderer as a preset. Going to atmosphere tab - add atmosphere effects - merge - selected the file currently working in again, reloaded same fire effect over itself. However due to this process all over lighting effects in scene are changed due to using different renderer. Therefore this process was used only on the frames including the explosion to minimise loss in quality and consistency

All cameras are checked and animations are run through (over separate files due to previously mentioned problems) Test render frames are taken at different points to check final appearance

All items are unhidden (man skin etc) Quality is set to all medium / default - reflections and shadows halved for render speed - render setup - select size , quality etc - select camera view to render (can be done by highlighting viewport with camera as view before entering menu - save file path - file type (for network rendering recommended frame stills to send out jobs to all computers) chose TIFF format - IF ALL FILES WANTED TO BE SAVED IN SAME FILE MUST SELECT CLOUD NETWORK DIRECTORY SO ALL COMPUTERS CAN ACCESS FOLDER. highlight network render. press render to bring up next menu

Before continuing need to setup backburner (start - all programs - autodesk - backburner). Master computer requires manager to be opened and monitor. Setup up ports if required. Get master computers ip address (start - find - cmd - ipconfig in dos) go to monitor setup auto connect.
Go to any other computer to be setup as slave - open sever - enter host ip address and backburner with automate the rest.
Now can finish render menu. Change subnet mask to correct numbers (usually 255.255.0.0) set job name (name of task that appears in monitor) - connect (at least one slave must be setup to connect too, to send job) once connected press submit.

This process can be built up into a massive rendering farm by adding more and more servers

My project took approx 30hrs across 50+ machines to render, with power settings in the labs not setup correctly and students not given access, the machines had to be constantly monitored and mouse moved on each machine every 15minutes to prevent standby mode resulting in connection lost. The length of time and processing was mainly due to two features. Firstly the complicated lighting system in the hangar in my ambitious attempt to create the right atmosphere. Secondly the reflective puddles on the tarmac ground plane in the main scene. The puddles meant that a lot of detailed parts had to be rendered twice in each frame, firstly the object and secondly its duplicate in the reflection

Other rendering problems occurred when material file paths could not be found

File - manage - asset tracking - brings up this menu

where file paths can be stripped and reassigned

Folder was made in cloud drive to make sure all files could be accessed by all machines at all time incase of any other problems

Screen shot shows highlighted file path re assigned.
Secondly in customisation tab (along the top of the screen) - User file paths - external files - add - then add path to materials

Due to extremely excessive rendering times video editing time change from one week to hours. Using premier pro for first time - file - import - select fist frame - highlight numbered stills - puts al files in folder into mini video clip to drag down into time line - add all sections
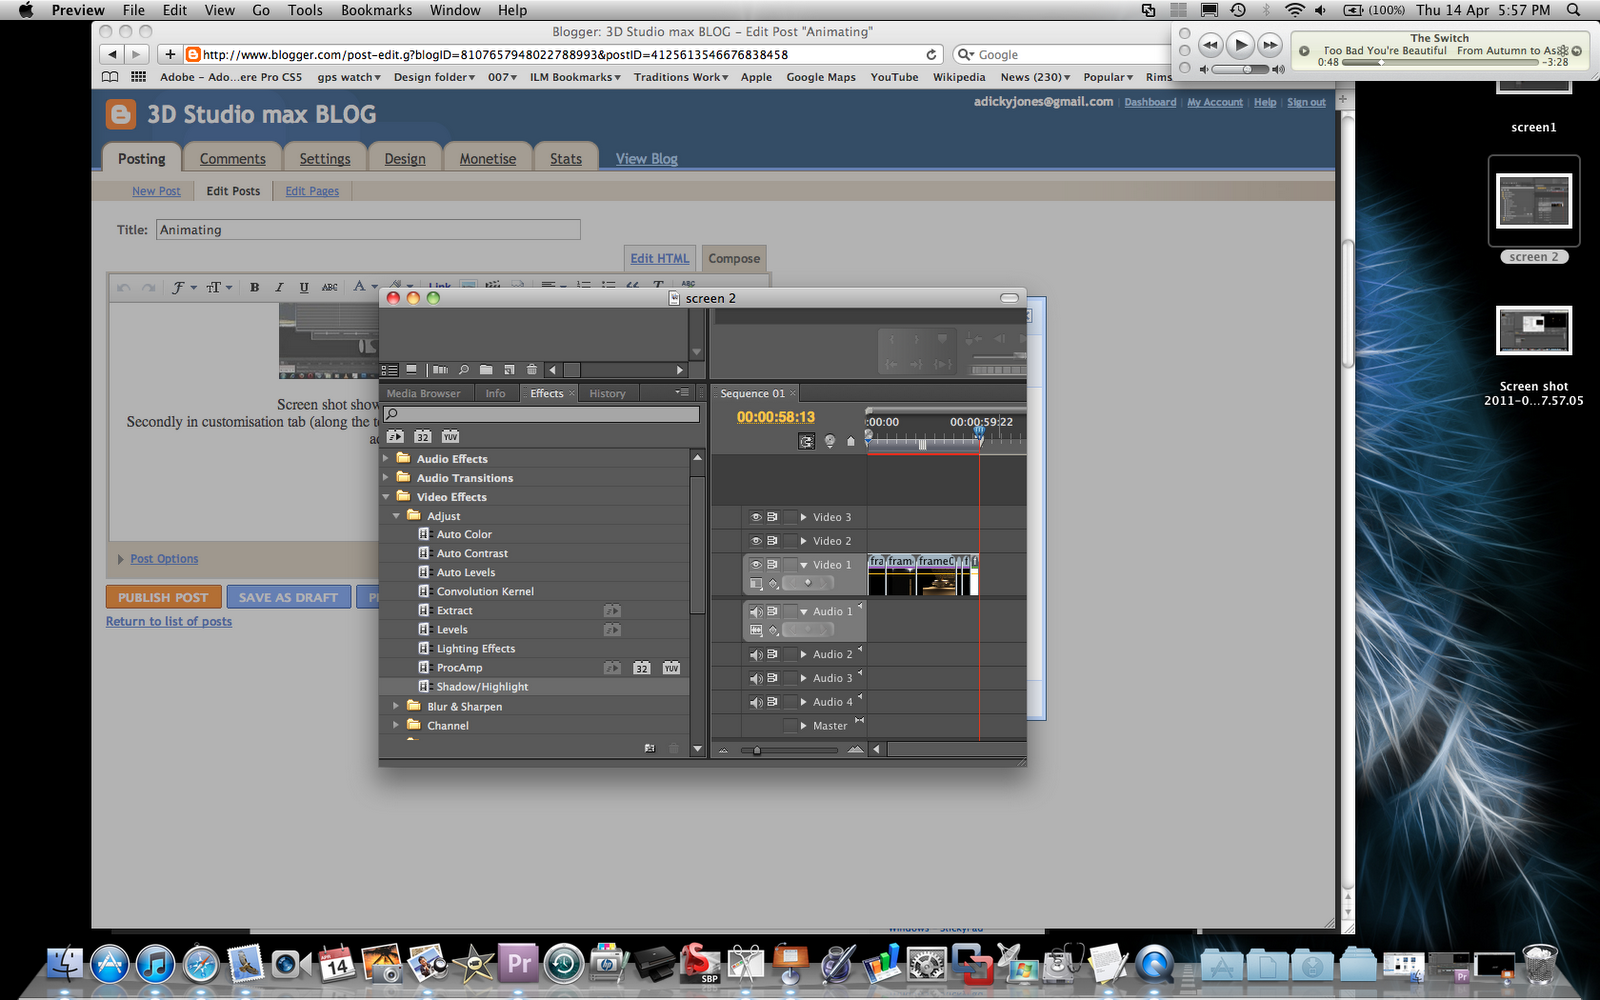
Used effects - video effects - adjust - shadow/highlights to adjust lighting on explosion to be more linear with previous lighting settings

Created slides in keynote to be spliced into video. After many unsuccessful attempts to transfer files. Decided to film them directly onto phone - feed footage back on computer a mini film clips - then splice into film

Imported All clips + all slides as mini videos + bought james bond theme tune (moby version)
Drag and dropped into position, cut and edited lengths
Cut first film clip in two to add text in between sequence.
re-imported clip as two separate half length clips
Tested just my footage first then edited and adapted once knew all clips/frames worked
No comments:
Post a Comment